Minecraft Skin Maker
A Minecraft skin maker lets you draw the 64×64 PNG worn by your character. Start from parts, upload an existing PNG, or paint on a blank base, then preview it in 3D with Classic or Slim arms. Make a free skin for Java or Bedrock with no sign-up and nothing to install.
What this skin maker can and can’t do
Can do
- Build a character from parts presets.
- Draw and edit pixels on a 64×64 skin.
- Open and change an existing PNG.
- Preview the skin in 3D with Classic or Slim arms.
- Download a 64×64 PNG.
Can’t do
- It does not generate skins from photos or text.
- It does not draw directly on the top, bottom or side faces.
Example skins
Choose a look to load it into the editor.
How to make a Minecraft skin
PixelSkinLab, a free Minecraft skin editor that runs in your browser, lets you paint a skin and preview it on a 3D model.
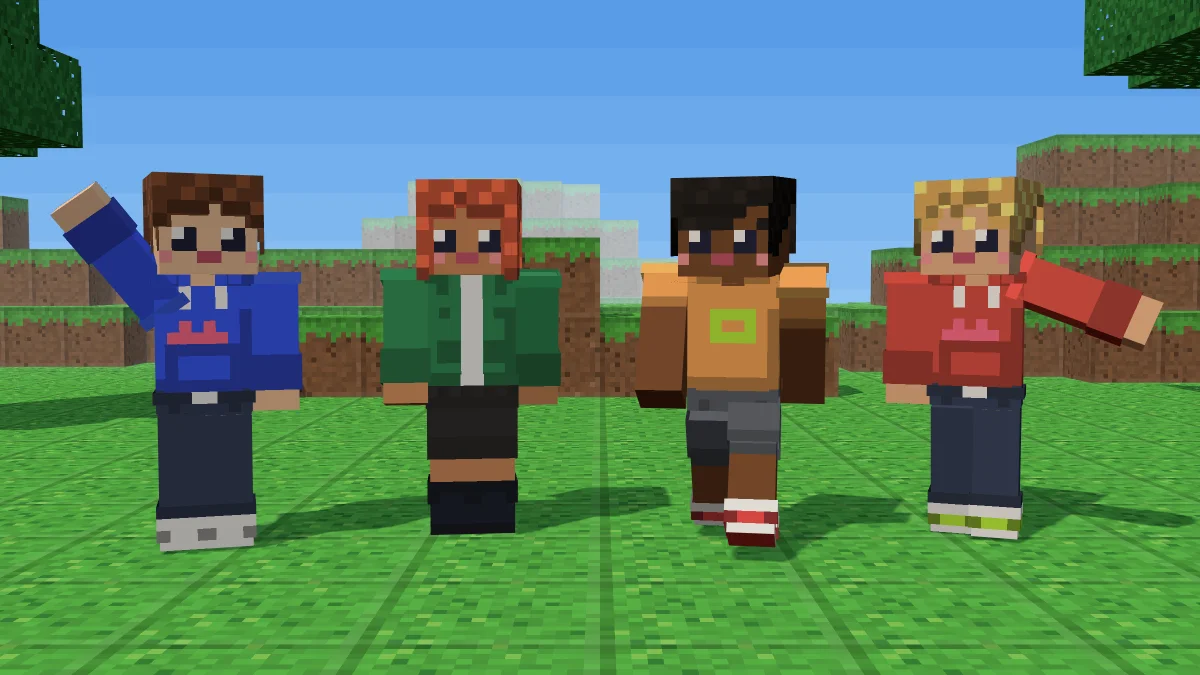
A Minecraft skin is one flat PNG, 64×64 pixels, that the game folds around a blocky character. You paint the flat image and the game does the wrapping. This editor shows you both at once, so you see where each pixel lands before you download.
- Pick a start. Choose “Start from parts” to build a character from hair, a top, a bottom and shoes, then change the colours. Choose “Upload a skin” if you already have a PNG. Choose “Start blank” if you want to paint from a plain base.
- Paint on the flat sheet. Click a pixel on the 2D sheet and the 3D model changes at the same spot. Do the base layer first: skin, shirt, trousers. Then switch the Layer control to Outer and add hoods, hair, glasses and sleeves. Press S for the shade tool and M to mirror strokes between the left and right sides.
- Download and import. Click Download PNG. Upload it with the same arm model you painted, Classic or Slim. The next two sections give the steps for each edition.
How to use your skin in Java and Bedrock
Free, no sign-up, nothing to install.
The two editions load skins in different places. Use the section for the one you play.
Import to Java Edition
- Open the Minecraft Launcher and choose Java Edition on the left.
- Click the Skins tab at the top.
- Click New Skin and type a name for it.
- Choose Classic or Slim. Pick the one you painted.
- Click Browse, select your PNG, and click Save & Use.
Start the game. If the old skin is still on your character, quit to the title screen and rejoin the world.
Import to Bedrock Edition
- From the main menu, open the Dressing Room (the character screen).
- Open Classic Skins, then Owned.
- Choose Import, then Choose New Skin.
- Pick your PNG and choose the arm model, Classic or Slim.
- Equip the skin.
Some consoles don’t support custom skin files.
My skin doesn’t show up right
Most failed imports come down to a few causes. Check them in this order.
- Black stripe down each arm. You painted Slim and uploaded as Classic, or the other way round. Upload again with the other model.
- Black patches on the body or legs. Some base-layer pixels are transparent. The editor warns you before you download and has a Fill them button for it.
- The old skin is still there. Quit to the title screen and rejoin, or restart the game.
- Wrong edition or account. Set up your skin separately in each edition: use the Minecraft Launcher for Java and the Dressing Room for Bedrock. You can import the same PNG in both places (Minecraft Wiki: Skin).
Base layer vs outer layer
Every skin has two layers.
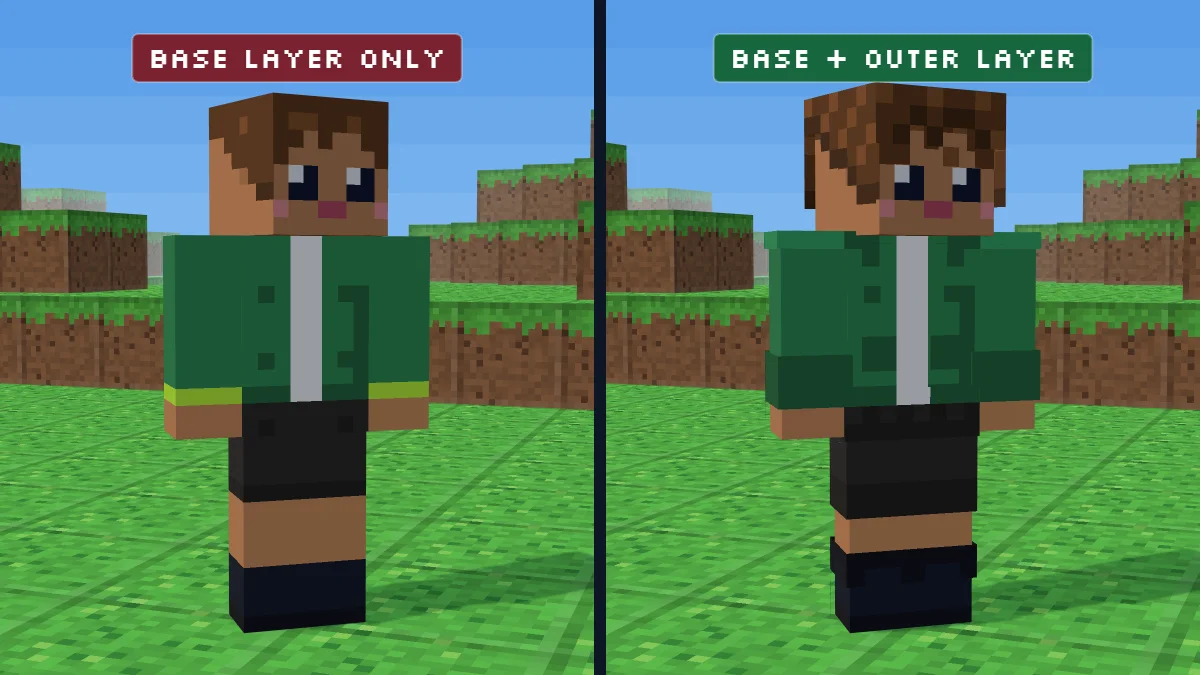
The base layer is the body itself.
The outer layer is a second shell drawn slightly out from the body: hoods, hair, sleeves, glasses, jackets.
The game draws both, and the outer layer is what gives a hat or a hoodie some thickness.
The two layers follow different rules:
- On Java, a see-through pixel on the base layer is drawn black. The outer layer can be fully transparent, partly transparent or solid, which is why it can hold hair strands and glasses.
- On Bedrock, pixels at 25/255 opacity or lower are not drawn (Minecraft Wiki: Skin). Don’t rely on see-through base pixels there; a skin that is solid on the base layer looks the same in both editions.
- Paint something solid on the base layer under every outer-layer detail. Where a hood is see-through, the head underneath still has to be painted.
In the editor, the Layer control (Base / Outer) chooses which layer your tools paint on.
In Base view you see only the body layer.
In Outer view the base is dimmed and the outer pixels show on top.
The 3D model always shows both.
The editor flags see-through base pixels that appear black in game.
Click Fill them to paint those pixels with the current colour.
Classic or Slim arms?
Classic arms are 4 pixels wide.
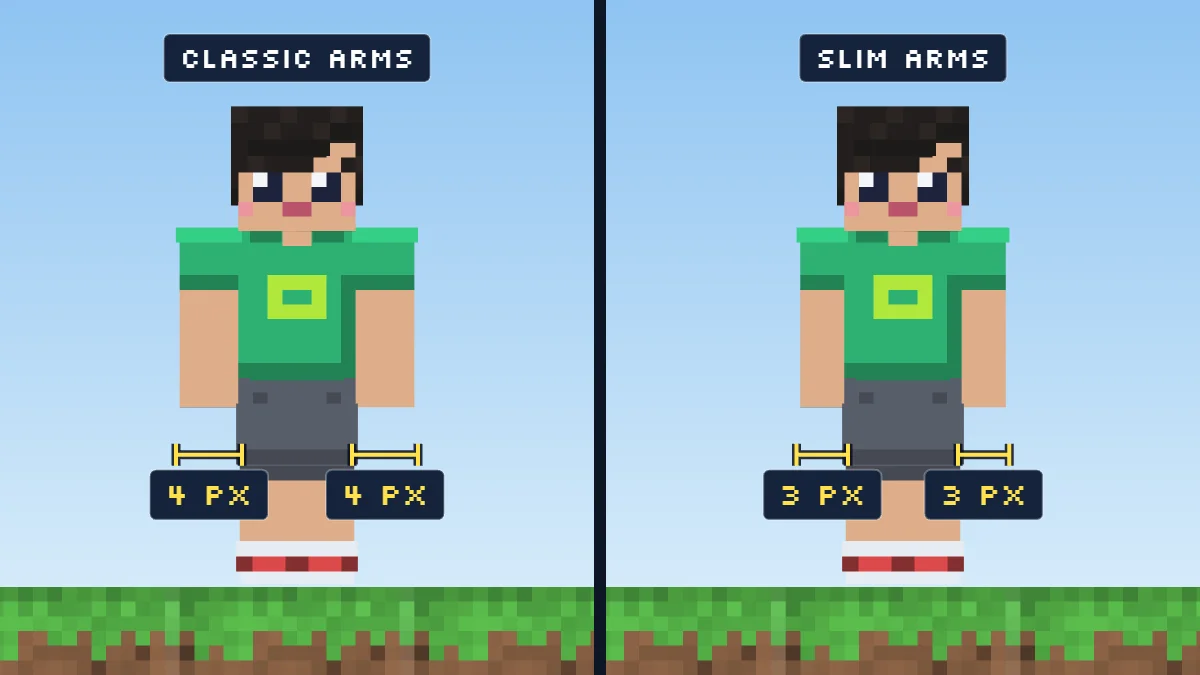
Slim arms are 3 pixels wide.
Choose one before you paint the arms, and pick the same one when you upload the skin.
Use the Arm model control under the editor to switch.
If the choice doesn’t match, the game shows a black stripe down each arm.
To check which model a skin uses, look at the arm area of the file: arms with a 3-pixel-wide front face are Slim. When you upload a skin the editor guesses the model and tells you what it found; switch it if it looks wrong. A labelled skin template shows which blocks belong to each arm.
Edit a skin you already have
Choose Upload a skin in the starts panel and drop your PNG on it. The file opens on the sheet and is processed in your browser; nothing is uploaded to a server. Paint over it, switch the model if you need to, and download a new PNG.
Old 64×32 skins open too.
They have one layer and no separate left arm or leg.
The editor copies the right limbs onto the left and downloads a 64×64 PNG, which leaves room for an outer layer.
After you open one, check the left arm and left leg and repaint any detail that should differ.
Hair, shading and clothes
Start from parts to build a skin quickly. You can repaint any generated pixel on the sheet.
What you can paint in the editor, and where it sits on the sheet
The editor shows a flat front view and a flat back view.
Use the Front / Back control to switch.
Each view has the head, body, arms and legs you see from that side, on whichever layer you picked.
The top, bottom and sides of each part are filled in when you start from parts.
To paint those faces by hand, use the template and a paint program.
In the PNG itself, each part is a cross-shaped strip.
The top and bottom faces are on the upper row of the strip.
The right side, front, left side and back sit side by side below them.
Where the front faces start on the 64×64 sheet (x across, y down):
- Head: front at x 8, y 8, 8×8 pixels. The outer-layer hat front is 32 pixels to the right, at x 40, y 8.
- Body: front at x 20, y 20, 8 wide and 12 tall. The back is at x 32, y 20, after the two side faces.
- Right leg: front at x 4, y 20. Right arm: front at x 44, y 20. Classic arms are 4 pixels wide, Slim arms 3.
- Left leg: front at x 20, y 52. Left arm: front at x 36, y 52.
- Outer layer: body at x 20, y 36; right leg at x 4, y 36; right sleeve at x 44, y 36; left leg at x 4, y 52; left sleeve at x 52, y 52.
The outer layer extends beyond the body. It sits 1 pixel out from the head and half a pixel from the body, arms and legs.
How to paint hair on a Minecraft skin
Hair is the part players look at first and the part most skins get wrong.
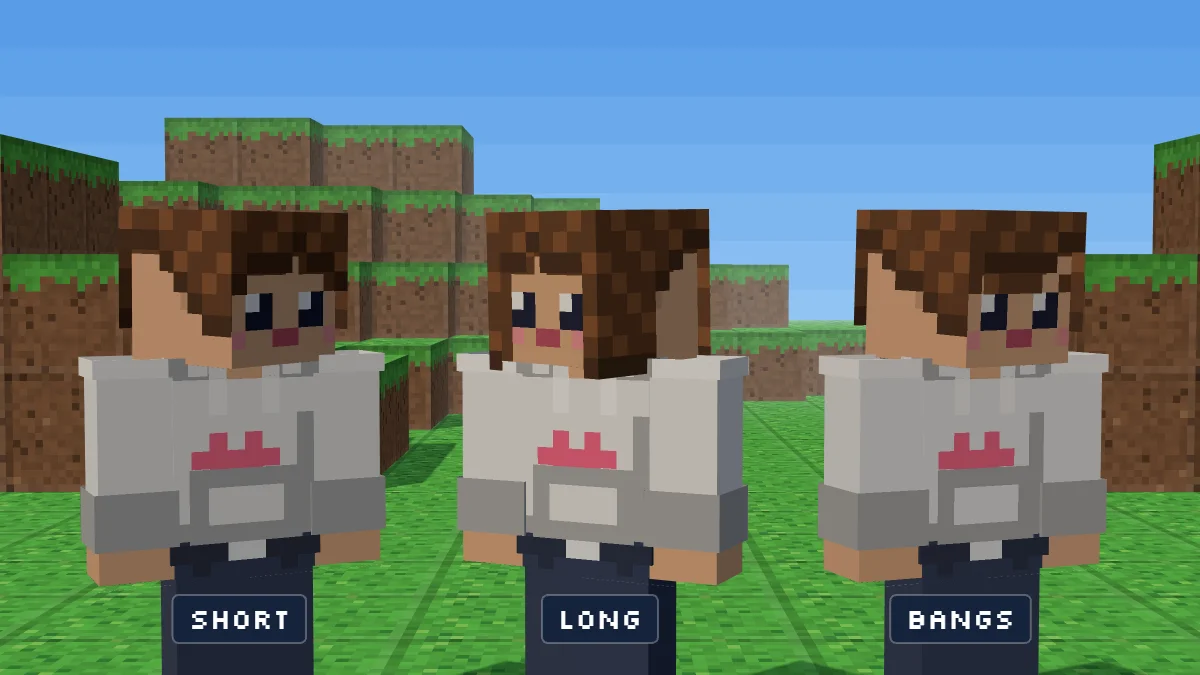
It is also where the outer layer matters most.
You can start from the Hair choices in Start from parts (Short, Messy, Long, Bangs, Buzz) and then change them, or paint from scratch.
Work in this order.
Step 1. Fill the head with the darkest shade
Pick a hair colour.
Choose Base and switch to the Front view.
Paint the head’s front rows to set the hairline.
Use two rows for short hair and three for a fringe.
Then switch to Back and paint the whole back of the head.
This base layer is solid, so there is no see-through pixel left on the head underneath.
Step 2. Add the main shade on the outer layer
Switch to Outer and paint the main shade over the same area. Because the outer layer sits out from the head, the hair now has volume. Hair that covers only the front looks like a mask, so make sure the back view is painted too.
Step 3. Break the surface with strands
Use a darker shade to draw short vertical strokes, two to three pixels long, from the part line down. Leave two or three pixels of the main shade between strokes. Stripes of equal width look like a barcode, so vary the length: three pixels, then two, then three.
Step 4. Put the highlight where the light hits
Choose the light direction and stay with it.
With top-front light, the brightest hair is in a small patch on the upper front of the head.
Hair is shinier than cloth, so a clear highlight usually looks better than a faint one.
Try one highlight shade, not two, until you are comfortable.
To make one, click a hair pixel with the Shade tool (S) while holding Shift.
Step 5. Check it from the back and with the 3D turn buttons
Use the arrows under the 3D model to turn the character. The back of the head is where flat hair shows. Paint it with the same shades as the front, not one colour.
Another program with a free colour picker can shift hue as well as brightness.
Move highlights toward yellow.
Move shadows toward red or purple.
The Shade tool only changes brightness.
Hair styles in pixels
- Short hair. Cover the top two rows of the face and the whole back view.
- Fringe or bangs. Cover the top three rows of the face. Make the bottom row uneven, with one or two pixels hanging lower than the rest.
- Long hair. Paint the back of the head, then run the hair down the back of the body on the outer layer. Put skin or shirt colour on the base layer under it.
- Hats and hoods. Paint the hat or hood on the outer layer and the hair under it on the base layer.
Shading a Minecraft skin: light, shadow and detail
Shading is what separates a skin that looks flat from one that looks drawn. It is also easy to overdo on a 64-pixel sheet.
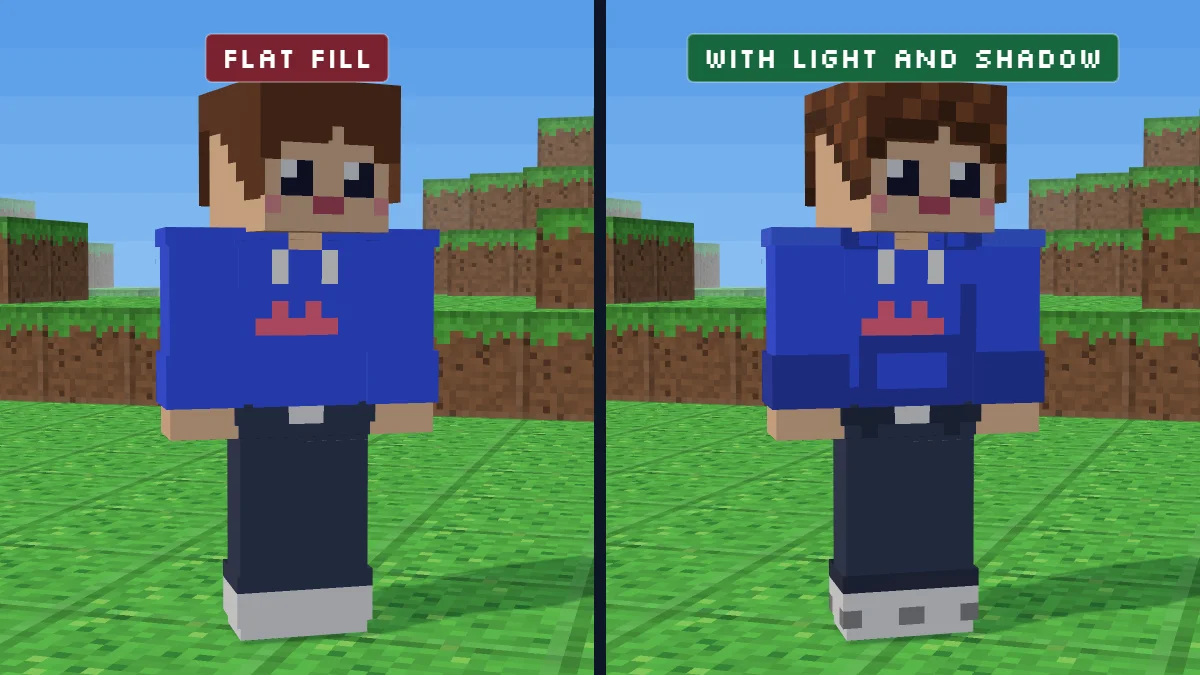
**Pick a light direction.
** Top front is the safest.
Everything that faces up is lighter; everything that faces down or is tucked in is darker.
Shadow goes under the fringe and chin, under the arms, along the hem and at the inner edge of each leg.
**Use two or three tones per colour.
** Base, shadow and highlight are enough.
Keep the steps close; a big jump between shades shows as stripes.
Keep highlights slightly lighter, shadows slightly darker, and use fewer shades with stronger contrast where it counts.
Shade the outer layer one step darker than the layer beneath it. A sleeve or jacket that matches the base colour has no depth. Make the outer pixels one tone darker near the edges.
**Avoid pure black outlines.
** Black lines around every shape make the skin look heavy.
If you want an outline, use a darker tone of the shape’s own colour.
This also keeps the skin readable on dark backgrounds such as caves and the Nether.
**Use the Shade tool.
** Press S, then click or drag across pixels.
Each pixel in one drag steps one notch darker; hold Shift to step lighter instead.
Because the tool won’t go further in one drag, release and drag again for a stronger shadow.
The Picker (I) copies a colour from the skin, so you can reuse a shade you already made.
How to draw clothes: hoodie, skirt, jeans and boots
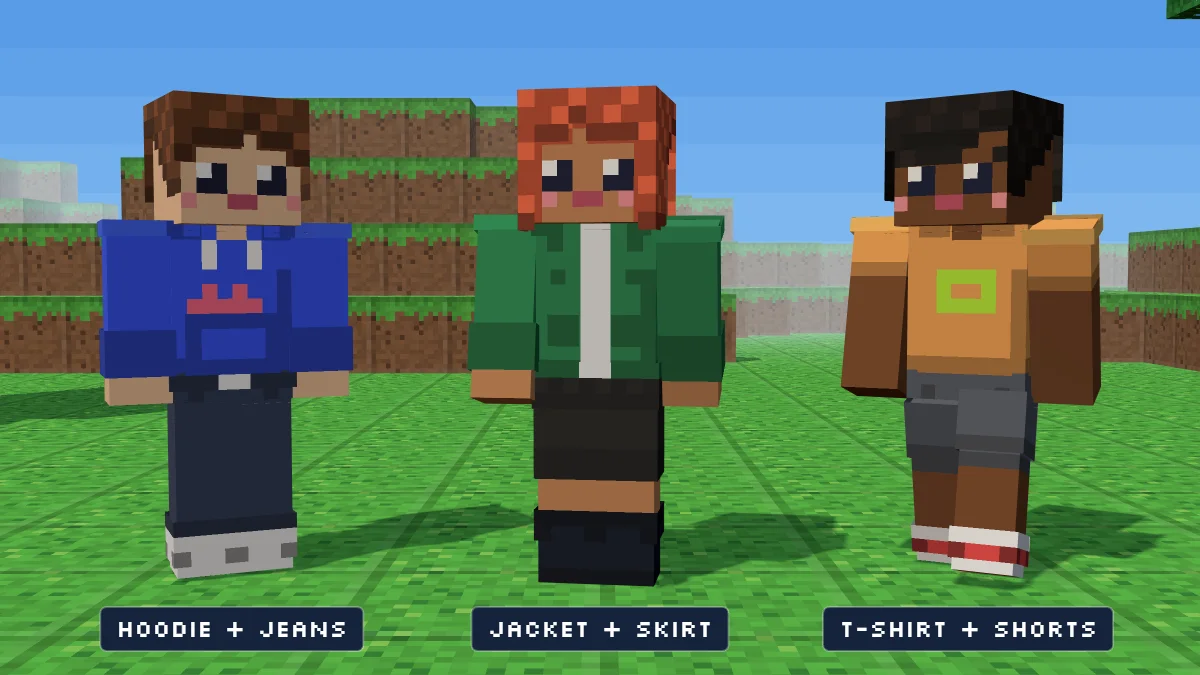
Start from parts gives you a Top (Hoodie, T-shirt, Jacket), a Bottom (Jeans, Shorts, Skirt) and Shoes (Sneakers, Boots), each with colour swatches. The notes below help when you want to paint or change one yourself.
The Fill tool (F) fills one whole face of a part, such as the front of the body, with the current colour.
It is the quickest way to lay in a base colour.
On the Outer layer, Fill makes the whole face solid, so use the Eraser (E) to clear what shouldn’t be covered.
On the outer layer the Eraser clears the pixel; on the base layer it restores the starting colour.
Hoodie
A hoodie is a body and sleeves in one colour, a hood, and a front pocket.
- On Base, Fill the front and back of the body and both arms with the hoodie colour.
- On Outer, paint the hood on the head as a ring around the face: one row across the top of the face and one column down each side, leaving the middle open. On the back view the hood is solid.
- Add a pocket on the front of the body, two to three rows tall, one tone darker than the hoodie.
- Put the cuffs on the last row of each arm, one tone darker.
Skirt and dress
Paint the skirt on the outer layer of the body and legs. Cover the outer body from the waist down and the top four to six rows of each outer leg. Put leg or tights colour on the base layer under it so no see-through pixels are left.
Jeans and shoes
Fill both legs.
Keep the waistband one row of a different shade so there is a visible line where the shirt ends.
For shoes, paint the bottom two rows of each leg.
Use four rows for boots.
Add a darker sole on the last row.
Jackets and accessories
Place raised details on the outer layer.
This includes jackets, collars, and accessories.
Glasses are one row across the eyes on the outer layer of the head.
A belt is a single row on the outer body.
Badges and logos should be at least two to four pixels, or they are lost in game.
Faces, eyes and skin tone
The face is only 8×8 pixels, and it is where most players look when they see your skin in a menu.
- Eyes. A common layout is the eyes on the fifth and sixth rows from the top, two pixels wide each, with two pixels of skin between them. Use a dark pupil and one pixel of very light grey for the white, not pure white, so they do not glow.
- Eyebrows. One row above the eyes in the hair colour or a darker skin tone. Slant them down toward the nose for a serious look and up for a friendly one.
- Mouth. One pixel for a neutral mouth, two or three in a row for a smile, in a muted red or a tone slightly darker than the skin.
- Skin tone. Try a base tone plus one darker step, not one flat colour. Put the darker step under the fringe and chin. Use the same tones on the hands and neck so the character looks like one person.
Leave the face open on the outer layer unless you want glasses, a mask or face paint. Any pixel you put there covers the face underneath.
Pick a colour plan before you paint
A colour plan is a short list of colours you will use. Try to keep it small: a skin with a handful of colours usually looks designed, and a skin with dozens looks random.
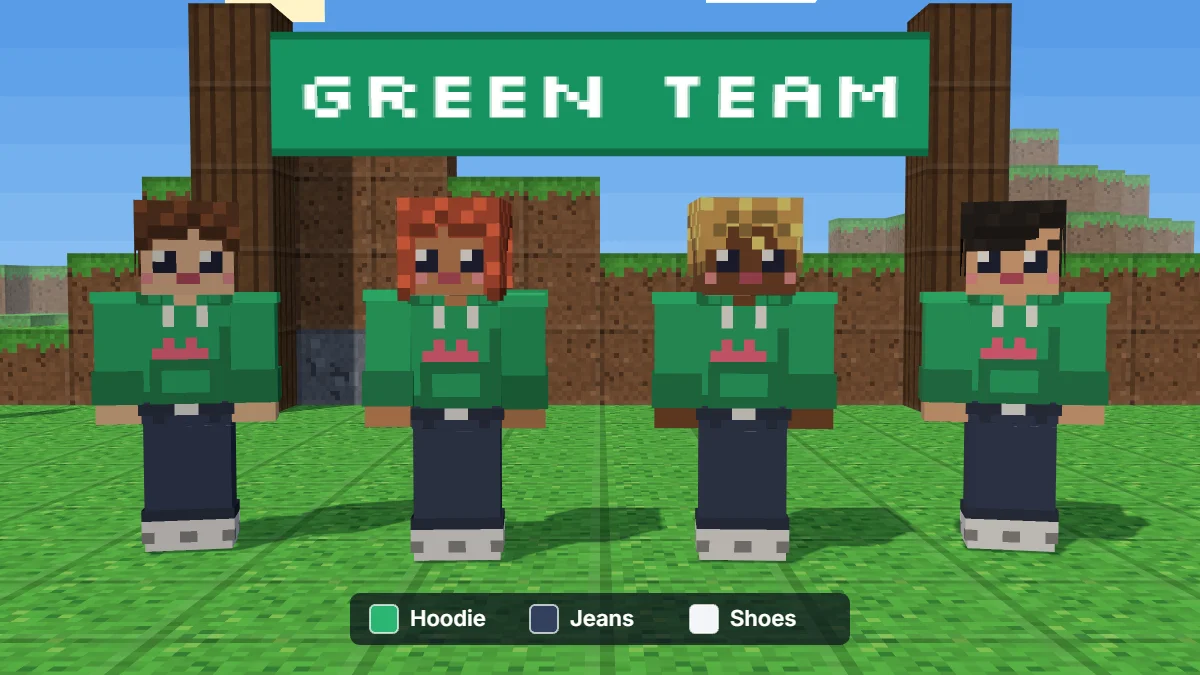
- Choose three anchors: hair, main clothing and an accent.
- Make a shadow and a highlight for each with the Shade tool, rather than picking new colours.
- Add skin tone and shoes.
- Reuse colours with the Picker (I). Click a pixel that has the colour you want, and the pencil picks it up, so the same shade is used on the front, back and arms.
The editor has a row of 12 ready colours, and the Parts panel has its own swatches. If you need an exact colour that isn’t there, paint it in another program and upload the PNG.
Skin ideas that work in the game
Good skins are designed for how they are seen, which is usually small, moving and from a distance.
- Multiplayer servers. A strong silhouette helps: a distinct hair shape, a bright jacket, a hat. A skin that is all one mid-brown disappears into the terrain.
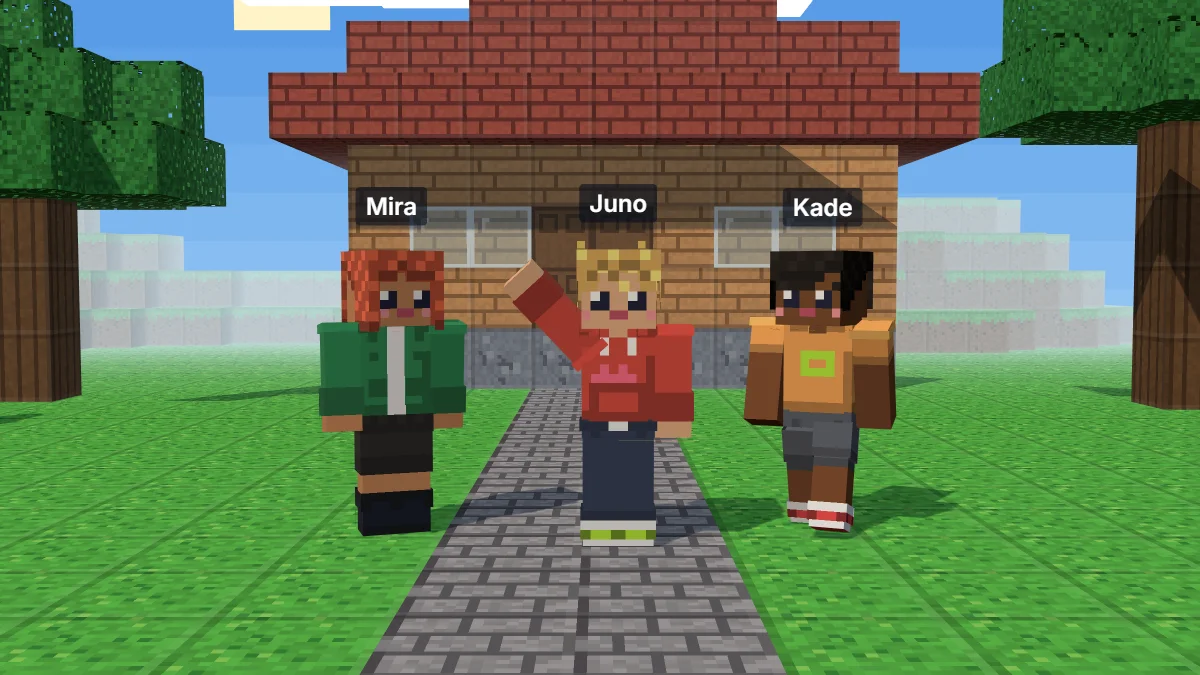
- Team and clan skins. Pick a shared colour for the body and a shared mark on the chest, and let each member choose their own hair and face.
- Themed skins. Pick one idea (a knight, a farmer) and give it three details: one on the head, one on the body, one at the feet.
- Profile pictures. Once you have a skin, you can make a profile picture from your skin.
- Check it from every side. Turn the 3D model and check the seams at the neck, wrists and waist before you download.
Common mistakes and quick fixes
| Problem | Why it happens | Fix |
|---|---|---|
| Hair looks like a helmet | One flat colour, no strands, only the front covered | Add strands (Step 3) and paint the back view too |
| Skin looks flat | One tone per area | Add one shadow and one highlight per colour with the Shade tool |
| Shading looks like stripes | Steps too far apart, or the same width everywhere | Use close tones and vary the length of strokes |
| Outer layer looks stuck on | Same colour as the base layer | Make the edge pixels one tone darker |
| Arms look wrong in game | Slim skin uploaded as Classic, or the reverse | Re-upload with the other arm model |
| Black areas in game | Transparent pixels on the base layer | Click Fill them in the editor |
| Left and right arms don’t match | Legacy 64×32 skin or only one arm painted | Turn Mirror on (M); repaint details that should differ |
| Face unreadable | Eyes too big or too many colours | Two-pixel eyes, one-pixel mouth, light grey whites |
| Skin vanishes on a server | Dark colours on a dark background | Add a lighter accent on the jacket or hat |
FAQ
A useful free skin maker has a 3D preview, base and outer layers, Classic or Slim arms, and needs no software download. PixelSkinLab is a free browser skin editor with those features. Hand-painting top, bottom, and side faces is not available in this editor; use a labelled template. It does not generate skins from photos.
Yes. Download the 64×64 PNG and import it from the Dressing Room in Bedrock. The same file works in Java.
Classic arms are 4 pixels wide and Slim arms are 3. Pick the same model when you upload the skin, or the arms show black stripes.
Yes. Choose Upload a skin, open the PNG and paint over it. Your file stays on your device.
Those pixels are transparent on the base layer. Paint every base-layer pixel; only the outer layer can be see-through.
Yes. It opens on the 64×64 sheet and downloads as a 64×64 PNG.
64×64 pixels, PNG.
Yes. They are two names for the same thing. This page works as a skin editor, creator and maker: open a skin, paint on it, download it.
Yes. The editor adapts to a narrow screen. Download the PNG, then import it in the Minecraft app with the Bedrock steps above.
No. It does not generate skins from photos or text. This tool paints by hand and doesn’t generate skins. Start from parts or paint your own.
Yes. Give each player the same colours or emblem, then change the details for each person. Download a separate PNG for every skin.
Yes. The editor fits narrow screens, though painting on a larger screen can be easier. Download the PNG and import it in Minecraft.
You need to load the page once while online; the editing itself runs in your browser. Keep the page open while you work.
Keep the base layer filled and use transparent pixels for outer-layer details. See the Minecraft Wiki: Skin page for Bedrock opacity rules.
The tool is free to use. You own a skin you draw yourself; a skin someone else made belongs to them.
Yes. Import the skin into the edition you use to join the server. Server settings or platform limits may affect whether other players can see custom skins.