- Home
- Minecraft Skin Template
FREE TOOL
Minecraft Skin Template
A Minecraft skin template is a flat 64×64 sheet that wraps around the player model. Hover a block to identify its part and face. Download a PNG, layered PSD or printable PDF.
How it works
- Choose Classic or Slim arms.
- Download a template or use your skin.
- Paint each square using the face labels.
- Check the result in the skin viewer.
Hover or tap any square to see which body part and face it belongs to. Click “Fold the head” to see how the flat sheet wraps into a cube.
64 × 64Classic arms (4 px)
Base layer Outer layer
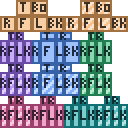
TTopBoBottomRRight sideFFrontLLeft sideBkBack
In the downloaded PNG, PSD and PDF the smallest blocks show B for Bo and K for Bk.
Head · Front (the face)Base layer · 8×8 px at (8, 8)
Head
Right leg
Body
Right arm
Left leg
Left arm
Right and left are the character’s own sides, so the right arm is on your left when it faces you.
See how the template folds
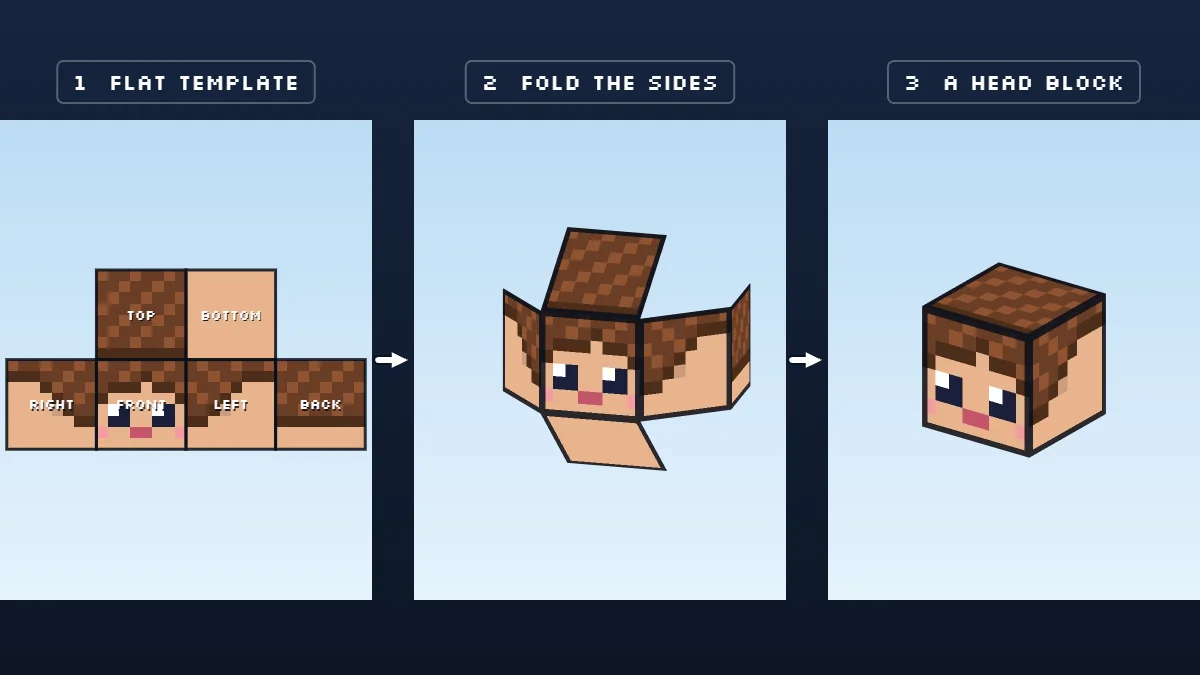
The six head blocks are one cube laid flat. Fold them to see the face land on the front and the T block become the top of the head.
Head
Base layer · box 8×8×8 at (0, 0)
Top 8×8 @ 8,0Bottom 8×8 @ 16,0Right 8×8 @ 0,8Front 8×8 @ 8,8Left 8×8 @ 16,8Back 8×8 @ 24,8
PDF paper
PNG works in any editor. The PSD keeps base and outer layer as separate layers and opens in Photoshop, Procreate and Photopea. In Aseprite, use the PNG.
View it on a 3D model →Free to download and use. Templates are original files made by PixelSkinLab, not files taken from the game.
How it works
- 01 / ARMS
Pick your arms
Classic 4 px · Slim 3 px - 03 / PAINT
Paint each square
Each square gets one colour; letters like F / T / R identify each face.
PixelSkinLab is a free Minecraft skin template library with PNG, layered PSD and printable PDF files.
SHEET No.01 / HOW TO
How this page works
- 01
Point at a block
Move your mouse over any coloured block, or tap it on a phone. The same part lights up on the body and the readout names the side.
- 02
Watch the head fold
Press Fold the head to see the six flat blocks turn into a cube, and see which edges meet.
- 03
Choose and download
Pick Classic or Slim, choose a style and file size in the download matrix, then open the file in your editor.
SHEET No.02 / READ THE MAP
How to read a Minecraft skin template
Each body part is a box, cut open and laid flat. A box has six faces: T top, Bo bottom, R right, F front, L left and Bk back.
The top and bottom sit in a row above the four sides. The sides appear in this order: right, front, left, back.
The sheet holds two copies of every part. The base layer is the body itself. The outer layer holds hats, jackets, sleeves and trousers. It sits slightly outside the base layer for hair, hoods, glasses and armour details.
The fold demo shows one box folding up, so you can see which edges meet.
SHEET No.03 / WHERE PARTS SIT
Where each body part sits
The coordinates below mark the top-left of each unfolded body part on the 64×64 sheet. Slim arms use three pixels across instead of four.
| Part | Base layer starts at | Outer layer starts at | Box size (w × h × d) |
|---|---|---|---|
| Head / Hat | 0, 0 | 32, 0 | 8 × 8 × 8 |
| Body / Jacket | 16, 16 | 16, 32 | 8 × 12 × 4 |
| Right arm / sleeve | 40, 16 | 40, 32 | 4 × 12 × 4 (Slim: 3) |
| Left arm / sleeve | 32, 48 | 48, 48 | 4 × 12 × 4 (Slim: 3) |
| Right leg / trousers | 0, 16 | 0, 32 | 4 × 12 × 4 |
| Left leg / trousers | 16, 48 | 0, 48 | 4 × 12 × 4 |
“Right” and “left” are the character’s own right and left, so when the character faces you, its right arm is on your left.
SHEET No.04 / SLIM ARMS
Slim template coordinates: what changes in the arms
A Slim arm is 3 pixels wide, a Classic arm is 4. Only the arms change. The head, body and legs keep the same coordinates in both templates.
Each arm rectangle keeps its starting corner. What changes is the width of the top, bottom, front and back faces. The two side faces stay 4 pixels wide, because the arm is still 4 pixels deep.
| Face of the right arm (base layer) | Classic | Slim |
|---|---|---|
| Top | x 44–47, y 16–19 | x 44–46, y 16–19 |
| Bottom | x 48–51, y 16–19 | x 47–49, y 16–19 |
| Right side | x 40–43, y 20–31 | x 40–43, y 20–31 |
| Front | x 44–47, y 20–31 | x 44–46, y 20–31 |
| Left side | x 48–51, y 20–31 | x 47–50, y 20–31 |
| Back | x 52–55, y 20–31 | x 51–53, y 20–31 |
The left arm starts at 32, 48 on the base layer. Its Slim front face is x 36–38, y 52–63. The Slim back face is x 43–45, y 52–63.
The outer sleeves follow the same pattern. The right sleeve starts at 40, 32 and the left sleeve at 48, 48.
A Slim arm strip is two columns shorter than a Classic one, so the last two columns of each strip are not used. On the right arm that is x 54–55 on the lower rows and x 50–51 on the top row. Leave those pixels clear.
If your arms show a black or empty stripe, the usual cause is a mismatch: a Classic skin used with the Slim model, or the other way round. Pick the template that matches the model you will choose when you upload. Bedrock also asks you to choose between the two models.
How the outer layer sits on the model
The outer layer is a second skin drawn slightly larger than the base. On the head it is 1 pixel larger, and on the body, arms and legs it is 0.5 pixel larger. That gap is why hair and hoods look like they have thickness.
Two rules matter when you draw on it:
- The base layer cannot be see-through in Java. Java Edition forces the inner layer to be fully opaque, so a transparent pixel there does not show as clear.
- The outer layer can be clear. It may be fully transparent, partly transparent or fully opaque.
Soft edges do not look the same everywhere. If you want them, test in the version you play. The skin viewer shows how the game draws each pixel.
A practical habit: draw the whole base first with solid colours, then switch to the outer layer and add only what should stand off the body.
SHEET No.05 / DOWNLOAD FILES
All Minecraft skin template files
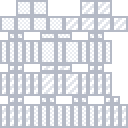
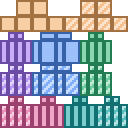
Every file comes in Classic or Slim, and in four styles: Labels (part names), Grid (pixel grid only), Colour (one colour per part) and Blank.
These templates are made by PixelSkinLab. They are not official Mojang files.
| File | Best for | Opens in |
|---|---|---|
| PNG, 64×64 | Drawing straight on the sheet | Any image editor |
| PNG, 128×128 | More detail, Bedrock-style editors | Any image editor |
| PNG, 64×32 legacy | Old skins and old tutorials | Any image editor |
| Layered PSD | Each part and layer on its own layer | Photoshop, Procreate, Photopea |
| Printable PDF | Drawing on paper, papercraft | Any PDF viewer or printer |
Which template should I download?
| Your goal | Download |
|---|---|
| Standard Java skin | 64×64 PNG |
| Classic arms | Classic |
| Slim arms | Slim |
| Old 64×32 skin | 64×32 PNG |
| Bedrock 128 | 128×128 PNG |
| Photoshop | PSD |
| Drawing on paper |

StylePNG 64×64PNG 128×128PNG 64×32PSDPDF A4PDF Letter
Labels
Grid

Colour


Grid
Colour
Blank


Free, no sign-up.
Rather paint on a screen? Use the skin editor.
SHEET No.06 / DRAWING APPS
Using the template in Photoshop, Procreate or Aseprite
Photoshop and Photopea. Use a 1-pixel hard brush and turn off smoothing. Keep the image at its original dimensions when exporting a PNG. Export as PNG, keep it 64×64, and do not scale it.
Procreate and iPad apps. Use a 1-pixel hard brush and turn off smoothing. Keep the image at its original dimensions when exporting a PNG. Export as PNG, keep it 64×64, and do not scale it.
Aseprite. Use the PNG template. Draw on a separate layer, then hide the guide before exporting your finished skin. Export as PNG, keep it 64×64, and do not scale it.
When you are done, check the result in the skin viewer to catch holes and arm-width mistakes.
SHEET No.07 / MORE DRAWING APPS
Drawing in GIMP, Krita and other apps
For sharp pixels, use a 1-pixel hard brush and turn off smoothing. Keep the image at its original dimensions when you export.
GIMP. Choose the Pencil tool for hard edges without anti-aliasing. Set its size to 1. Zoom in and enable the grid. Keep the template on a separate layer, then export a PNG.
Krita. Use a hard-edged brush at size 1. Enable the grid and pixel grid. Keep the template on its own layer.
These general settings also apply in Photoshop, Procreate, Aseprite, Paint.NET and iPad drawing apps. Menu names and controls vary by app.

Keep the PNG at 64×64, legacy 64×32 or 128×128 for Bedrock. A resized export can be rejected.
SHEET No.08 / MAKE SOMETHING
What you can make with the template
Draw a skin on paper.
Print the PDF with the Grid style, colour each square with pencils, then copy it into the skin maker. Good for kids and for planning a design before you touch a screen.
Papercraft figure.
Print the Colour style on thick paper, cut out each part and fold along the lines. The fold demo above shows how each box closes.

A classroom or club activity.
Hand out the Labels PDF so everyone learns which face is which, then let each person design their own character.
Digital painting.
Use the layered PSD so the base and outer layers stay apart. Paint shading on the base layer and details like hoods or glasses on the outer layer.
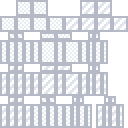
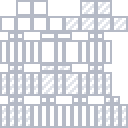
Fix one part of an existing skin.
Open your skin next to the Labels template and find the exact pixels for, say, the back of the head, without guessing.
SHEET No.09 / PAPER WORKFLOW
Draw on paper, then scan it into a PNG
You do not need a computer to start a skin. Print the Grid PDF on A4 or Letter paper.
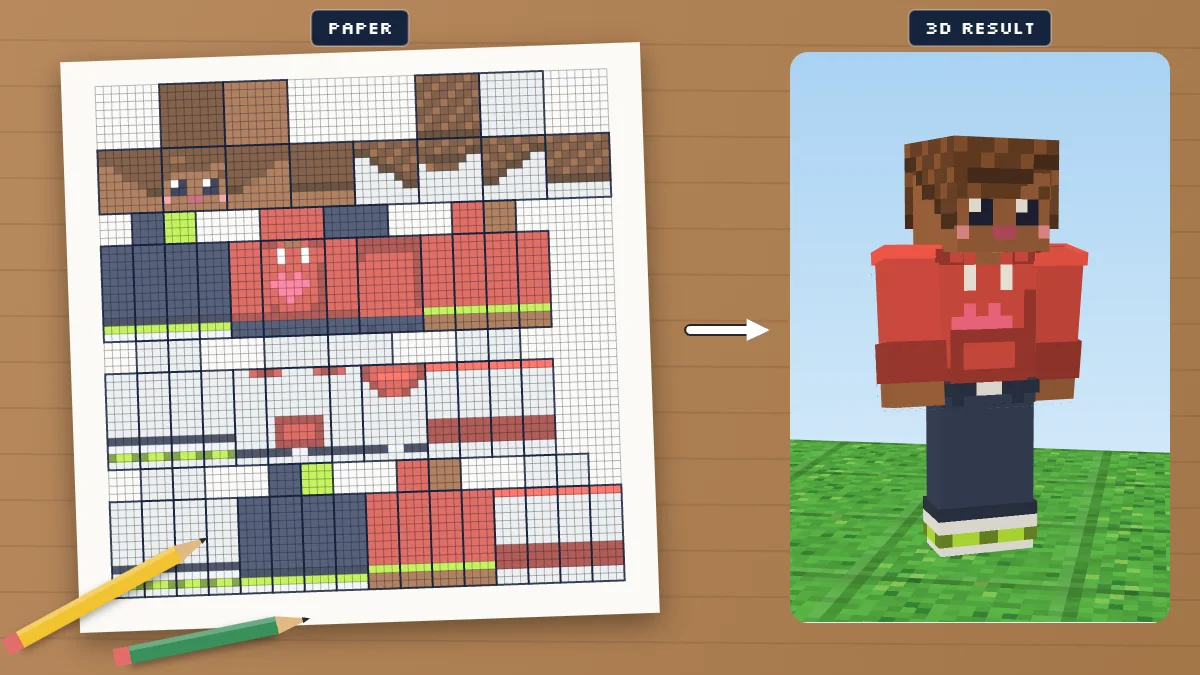
Colour the squares with sharp pencils or fine pens. For younger children, one base colour with a few simple face features is a good first goal.
To turn the sheet into a skin file:
- Scan it or photograph it in even light, from straight above.
- Crop to the edge of the template so no paper border remains.
- Resize to exactly 64×64 pixels, using Nearest Neighbour so colours do not blur.
- Save as PNG.
- Compare the result with the Labels template, because photos often skew by a few pixels.
A Java skin must be a PNG of 64×64 pixels, or the legacy 64×32. A phone photo is neither, so the resize step is not optional.
If the scan is crooked, redraw only the wrong squares in an image editor instead of starting over.
SHEET No.10 / CLASSROOM OR HOME
Using the template in a classroom, club or at home
The printed template makes a short lesson with no computer needed. Younger children can pick colours and patterns with an adult's help. Older children can often work on their own.

Here is a 40-minute plan you can adapt.
- Look (5 min). Show the Labels template. Ask students to find the front of the head and the back of the body.
- Plan (10 min). Each student sketches the character from the front, then picks three colours.
- Colour (20 min). Everyone colours the Grid template. The rule: every square holds one colour.
- Share (5 min). Pairs swap sheets and name which body part each section belongs to.
The activity teaches how to read a flat net of a 3D shape and work on a fixed grid. Students also practise giving positions as coordinates.

At home, print the Colour template as a key and the Blank one to draw on. An adult can do the upload, and can keep an eye on any online sharing.
SHEET No.11 / TROUBLESHOOTING
Common colouring mistakes
The arms are black or have a stripe. You used a Classic skin on a Slim model, or the reverse. Check the arm width first, and pick the template that matches.
The skin looks right on the sheet but wrong on the model. You coloured the left-hand face where the right-hand one belongs. The sheet's "right" is the character's own right, which appears on your left when it faces you.
The head looks hollow or see-through. In Java the base layer must be opaque. If you painted hair only on the outer layer, paint the matching base pixels too.
Colour spills over a face's edge. Faces sit side by side with no gap. A pixel one column too far lands on the next face. Turn on the pixel grid and keep the Labels template visible on a separate layer.
The skin is blurry or the colours changed. The program resized or smoothed the image. Switch to Nearest Neighbour and a 1-pixel hard brush, and do not save as JPEG, which adds compression noise.
The file will not upload. The size or format is wrong. Check the dimensions and confirm it is a PNG.
Detail is lost after switching Classic to Slim. The arm is one column narrower, so a design that used all four columns needs a redraw, not a stretch.
SHEET No.12 / FAQ
FAQ
A standard Minecraft skin template is a 64×64 PNG with Classic and Slim arm layouts and a separate outer layer. PixelSkinLab provides PNG, layered PSD and printable PDF templates. PNG sizes include 64×64, 128×128 and legacy 64×32. We do not provide a finished skin or a native file for every drawing app.
The standard size is 64×64 pixels. Bedrock also accepts 128×128.
Classic arms are 4 pixels wide, while Slim arms are 3. They match Steve-style and Alex-style models.
It is a second shell around each part. Use it for hair, hats, hoods, glasses and sleeves. Leave it clear where you want the base layer to show.
Yes. Download the PDF for A4 or US Letter.
The templates are free to use, including commercially. The skin you draw is yours.
The base layer has transparent pixels. Open it in the skin viewer to inspect the skin and find the gaps.
Yes. Both are 64×64. Only the arm faces are one pixel narrower on Slim.
No. Java uses 64×64 or legacy 64×32.
Any editor with a pencil tool and a pixel grid. GIMP and Paint.NET are free on desktop.
Yes. Choose the Blank or Grid style. Download a printable PDF or a PNG template.
Java skin sizes are listed in the Minecraft Wiki skin guide.
To see a finished skin on a 3D model, open it in the skin viewer.
SHEET No.13 / REFERENCES
Sources
Official documentation and reference pages